Pure Nim, easy to use and flexible UI framework. https://levovix0.github.io/sigui/apidocs/sigui.html
|
|
1 år sedan | |
|---|---|---|
| .github | 1 år sedan | |
| src | 1 år sedan | |
| tests | 1 år sedan | |
| readme.md | 1 år sedan | |
| sigui.nimble | 1 år sedan |
readme.md
Sigui
Pure Nim, easy to use and flexible UI framework.
Not quite ready for production
Sigui is inspired by QtQuick.
Table of contents
Examples
see also: tests
Basic
https://github.com/levovix0/sigui/assets/53170138/9509e245-2701-4dba-8237-a83f480aa635
import sigui, siwin

let win = newOpenglWindow(size=ivec2(1280, 720), title="Hello sigui").newUiWindow

win.makeLayout:
  - UiRect():
    this.centerIn(parent)
    this.w[] = 100
    this.binding h: this.w[]

    var state = 0.property

    this.binding color:
      (
        case state[]
        of 0: color(1, 0, 0)
        of 1: color(0, 1, 0)
        else: color(0, 0, 1)
      ).lighten(if mouse.hovered[]: 0.3 else: 0)

    - this.color.transition(0.4's)

    - MouseArea() as mouse:
      this.fill(parent)
      this.mouseDownAndUpInside.connectTo root:
        state[] = (state[] + 1) mod 3
      this.cursor = (ref Cursor)(kind: builtin, builtin: pointingHand)

run win.siwinWindow
Custom component
https://github.com/levovix0/sigui/assets/53170138/409cb2a3-5299-48a6-b01e-d8b7bb951fbb
import sigui/[uibase, mouseArea, animations, dolars]

type
  Switch* = ref object of Uiobj
    enabled*: Property[bool] = true.property
    isOn*: Property[bool]
    color*: Property[Col] = color(0, 0, 0).property

registerComponent Switch


method init*(this: Switch) =
  if this.initialized: return
  procCall this.super.init()

  this.isOn.changed.connectTo this, val:
    echo this

  this.makeLayout:
    this.w[] = 40
    this.h[] = 20

    - MouseArea() as mouse:
      this.fill(parent)
      this.mouseDownAndUpInside.connectTo root:
        if root.enabled[]:
          root.isOn[] = not root.isOn[]

      - UiRectBorder():
        this.fill(parent)
        this.binding radius: min(this.w[], this.h[]) / 2 - 2
        this.borderWidth[] = 2
        this.color[] = "aaa"

        - UiRect():
          this.centerY = parent.center
          this.binding w: min(parent.w[], parent.h[]) - 8
          this.binding h: this.w[]
          this.binding radius: this.w[] / 2
          this.binding x:
            if root.isOn[]:
              parent.w[] - this.w[] - 4
            else:
              4'f32
          this.binding color: root.color[]

          - this.x.transition(0.4's):
            this.interpolation[] = outCubicInterpolation

    this.newChildsObject = mouse


when isMainModule:
  preview(clearColor = color(1, 1, 1), margin = 20, withWindow = proc: Uiobj =
    var r = Switch()
    init r
    r
  )
Features
Events
var event: Event[int]
var eventHandler: EventHandler

event.connect eventHandler, proc(e: int) =
  echo e

event.connectTo eventHandler, val:
  echo "another ", val

event.emit 10
Events can be connected to EventHandler or HasEventHandler object. note that Uiobj fits HasEventHandler concept.
You can check event.hasHandlers for optimizing if you need to do complex logic to emit event. Don't do work if no one notice!
Properties and bindings
var x: Property[int]
var y = CustomProperty[int](
  get: proc(): int = 1
  set: proc(v:  int) = echo v
)
var eh: EventHandler

x.changed.connectTo eh:
  echo "x changes observed by event handler"

eh.bindingValue y[]: x[]

x[] = 10  # both "x changes observed by event handler" and "10"
Property[T] is container for T, wrapping variable into property
CustomProperty[T] instead holds get and set closures
AnyProperty[T] is concept:
type AnyProperty[T] = concept a, var v
  a[] is T
  a[] = T
  a.changed is Event[T]
  a{} is T
  a{} = T
prop{}/prop{}= can be used instead of prop[]/prop[]= to not emit changed event.
binding macros macros group will automatically subscribe to all properties' change events if they are mentioned. It isn't magic, binding macro will determine smth like it is property if you call [] on it (which is get proc).
There is:
uiobj.binding prop: ...: binds property that is field namedpropinsideuiobjeh.bindingValue val: ...binds to assignment tovaleh.bindingProc f: ...bind to call f(eh, body). Useful for nim-like properties (image=, len=, etc.)
Ui Objects
type
  MyComponent = ref object of Uiobj
    myState*: Property[int]
    myInternalState: int

registerComponent MyComponent


method init*(this: MyComponent) =
  if this.initialized: return
  procCall this.super.init()

  this.myState.changed.connectTo this, val:
    this.myInternalState = val

  this.makeLayout:
    - UiRect():
      this.fill parent

# ...
- MyComponent():
  # implicitly called init
  # ...
Ui object is viewable and temporary state container.
Components are usually implemented as Ui objects. It is good practice to use composition to make your own components.
Global position of child ui object is global position of its parent plus its x and y. Global position is position from top-left courner of window. All positions is counted in pixels.
Ui objects can receive signals.
Signals
import fusion/matching

type
  MySignal = object of SubtreeSignal
    val: int

method recieve*(this: MyComponent, signal: Signal) =
  case signal
  of of MySignal(val: @val):
    echo val
    # note: not calling this.super.recieve(signal) to not send MySignal to this object childs and not emit this.onSignal
  else:
    procCall this.super.recieve(signal)

# ...
obj.parentUiWindow.recieve MySignal(val: 10)
# or
obj.recieve MySignal(val: 10)
Signals is global "events", recieved by all ui objects in hierarchy. Window events is signals.
Signals are more useful than events when you need to control order in which signals are handled.
Ui objects also have onSignal event.
Animations and transitions
Animation is just interpolation between 2 values over time and doing action using this value.
Transition is just animation, that is subscribed to property changing, and its action is changing property.
Interpolation modifier (which is function, that takes float between 0..1 and returns modified float value around 0..1) can be attached to animation via anim.intermolation[]=
Built-in interpolation modifiers:
linearInterpolation(default)outSquareInterpolationandoutQubicInterpolation- faster at start, slower at endinSquareInterpolationandinQubicInterpolation- slower at start, faster at endoutBounceInterpolation- like outSquare, but goes above target value and back at endinBounceInterpolation- like inSquare, but goes under start value at start
Layouts
not to be confused with makeLayout macro
- Layout():
  this.h[] = 720
  this.spacing[] = 10
  this.wrapSpacing[] = 20
  this.orientation[] = vertical
  this.wrapHugContent[] = true
  this.fillWithSpaces[] = true
  this.consistentSpacing[] = true
  this.wrap[] = true
  this.elementsBeforeWrap[] = 3
  this.binding lengthBeforeWrap: this.w[]

  - UiRect():
    this.w[] = 20
    this.w[] = 30

  - InLayout():
    this.alignment[] = center

    - UiRect():
      this.w[] = 10
      this.h[] = 10

  - UiRect():
    this.w[] = 30
    this.w[] = 20
makeLayout
type
  MyLayout = ref object of Uiobj
    changableChild: CustomProperty[UiRect]

registerComponent MyLayout


let x = MyLayout()
x.makeLayout:
  - UiRect():
    this.fill parent
    this.binding color: rect2.color[].darken(0.5)  # objects created and aliased using `as` can be referenced before declaration

    - UiRect() as rect2:
      this.w[] = 20
      this.w[] = 30
      this.color[] = color(1, 1, 1)

      root.changableChild --- UiRect():
        # actions in this body will be executed when root.changableChild is changed
        this.fill(parent, 2, 4)
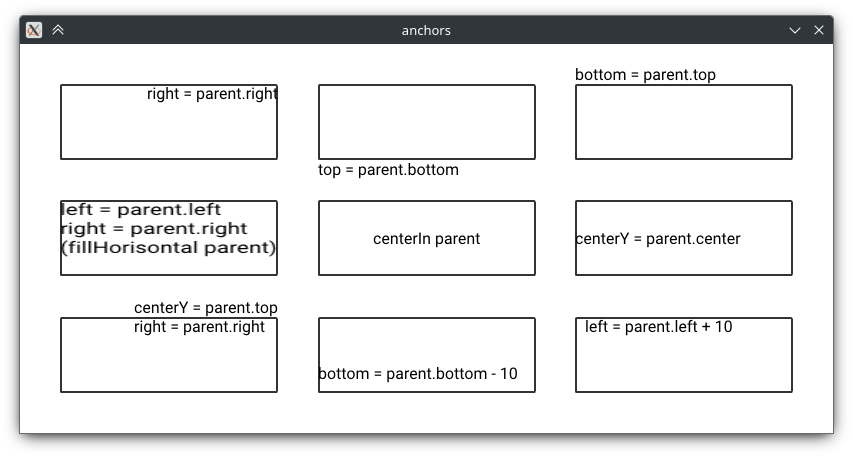
Anchors
 yes, centering component is just
 this.centerIn parent, is it so hard, html?
- UiRect():
  this.fill parent
  this.color[] = color(0, 1, 0)

  - UiRect() as rect:
    this.left = parent.center
    this.right = parent.right
    this.bottom = parent.bottom - 10  # -i always means up/left and +i means down/right, even if theese all are bottom anchors
    this.color[] = color(1, 0, 0)

  - UiRect():
    this.centerX = rect.left
    this.centerY = parent.center + 1
    this.color[] = color(0, 0, 1)
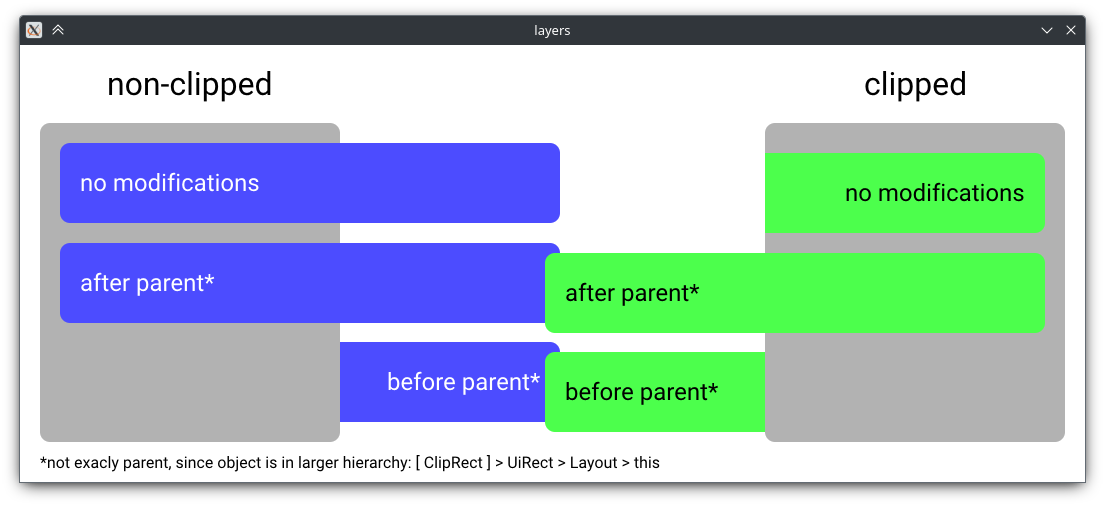
Layers
 Unlike other ui libs, sigui don't have z-indices. Instead, you can directly specify component
 before, after or beforeChilds your component should be rendered.
- UiRect():
  #...

  - UiRect() as rect:
    this.drawLayer = before parent

- UiRect():
  this.drawLayer = after rect
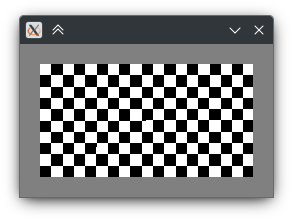
Custom shaders
import shady

type ChessTiles = ref object of Uiobj
  tileSize: float

registerComponent ChessTiles


method draw*(this: ChessTiles, ctx: DrawContext) =
  this.drawBefore(ctx)
  if this.visibility == visible:
    let shader = ctx.makeShader:
      {.version: "330 core".}

      proc vert(
        gl_Position: var Vec4,
        pos: var Vec2,
        ipos: Vec2,
        transform: Uniform[Mat4],
        size: Uniform[Vec2],
        px: Uniform[Vec2],
      ) =
        # default sigui specific transformation to correct locate component on screen
        # and convert opengl's coordinate system (-1..1) to sigui's coordinate system (0..windowSize_inPixels)
        # out `pos` is component-local (0..componentSize_inPixels)
        transformation(gl_Position, pos, size, px, ipos, transform)
        # don't use it if you don't need it (and don't call `ctx.passTransform` if so)

      proc frag(
        glCol: var Vec4,
        pos: Vec2,
        tileSize: Uniform[float],
      ) =
        if (
          (pos.x - ((pos.x / (tileSize * 2)).floor * (tileSize * 2)) >= tileSize) ==
          (pos.y - ((pos.y / (tileSize * 2)).floor * (tileSize * 2)) >= tileSize)
        ):
          glCol = vec4(1, 1, 1, 1)
        else:
          glCol = vec4(0, 0, 0, 1)

    glEnable(GlBlend)
    glBlendFuncSeparate(GlOne, GlOneMinusSrcAlpha, GlOne, GlOne)

    use shader.shader
    ctx.passTransform(shader, pos=(this.xy[].posToGlobal(this.parent) + ctx.offset).round, size=this.wh[].round, angle=0)
    shader.tileSize.uniform = this.tileSize

    draw ctx.rect

    glDisable(GlBlend)
  this.drawAfter(ctx)
Builtin components
Text Area
https://github.com/levovix0/sigui/assets/53170138/56007317-7558-459d-bf79-ff9b44b7ac6b
Text area allows user to write text.
It has .active property.
It is cropped.
Configure .allowedInteractions if you need somthing advanced.
const typefaceFile = staticRead "../../tests/Roboto-Regular.ttf"
let typeface = parseTtf(typefaceFile)

- TextArea():
  this.text[] = "start text"
  this.textObj[].font[] = typeface.withSize(24)

  # note: create your own UiText to make tip/hint

